Daily Reads

Showing posts with label crafty. Show all posts

5.07.2013

The big blue chest of drawers

After being inspired by this photo for months, we finally set aside some time and refinished our old wooden chest of drawers and I couldn't be happier with the result! 
So here she is before her makeover. This chest has been in my family for over 25 years (and someone else's family before that - my parents bought it at a consignment shop in the 80s!) It's been used as a dresser in many different bedrooms, and now we're using it in the living room for storage and as a record stand. It's a pretty piece, and it wasn't so bad before, but  in our living room with the wooden floors and the adjacent brown leather couch it was just too much wood and too much brown. I also thought the space needed some shine, and I wanted to swap out the dark antique-style hardware for something a little more fresh and shiny. I knew I liked the look of bold color with brass hardware because I had seen it here on Little Green Notebook, and here on Hommemaker (with tutorial included).

I loosely followed the steps in the Hommemaker tutorial, above. (I skipped sanding since we were doing the whole job indoors, in our living room, while our toddler slept, I'm pregnant and not as nimble as I used to be, and I was assured by the nice lady at Lowes that sanding was unnecessary if I used primer. She was wrong. And while the finish is fine, it's less than the perfect, glossy lacquer I had imagined. I wish I had followed Orlando's instructions and just done a little sanding! Lesson learned for next time.) So, here's what we did:
First, we removed all the old hardware, and I wiped the whole chest down with a damp cloth to remove dust and anything else that might be on the surface. Next we painted the whole unit with a latex primer. We used a foam roller for the large flat surfaces and a brush for the more detailed work. Then we applied two coats of a high-gloss latex paint, allowing the paint to dry fully for 24 hours between coats. I let everything dry for three days before we put it back together and put on the new hardware (we used these and these). 

And that's it! Not bad at all, considering the way this has changed our living room. It's so much brighter and fresher now. I feel like it updated the whole space. And now that I know how easy it is, I'm eyeing several other wooden pieces around the house that could use some color....

2.12.2013

Valentine's Day Faves

I'm all excited about celebrating Valentine's Day with my guys this year. 
I'm so very thankful for them, and I love any chance to surprise them and spoil them a little bit.
So, here are a few of my faves that are inspiring me to share the love. Enjoy! xoxo

The cutest lovebug valetines ever.

Florals every man will love.


50 DIY hearts. And they're all good!

Wouldn't you love to turn a corner and see this?

Sweet wrapping you can make at home.

And, Paperman - six minutes of Oscar-nominated romance :)

11.30.2012

Advent calendar

I love the idea of advent calendars, and now that Michael is old enough to be excited about Christmas I wanted to put something special together. After pinning examples all year (1, 2, 3, 4) I combined my favorite parts and came up with this! The materials and method are super simple. I found a pretty ribbon, tiny envelopes and cards at the craft store. I numbered the envelopes and decorated them with snowflake stamps, then hung the ribbon and clipped each envelope with a paper clip. I wrote a different activity on each card. Since Michael is so young, I kept the activities pretty simple: 

decorate christmas tree
eat a candy cane
unwrap a book
bake cookies
unwrap a toy
sponsor a child
take gifts to the neighbors
drive around and look at the lights
movie night with popcorn
sing Christmas carols
read 'The Night Before Christmas'

I hope to keep the garland and change the activities on the cards as Michael grows. 
Christmas season starts tomorrow - I can't wait to get started! Happy weekend, friends. xoxo

11.24.2012

A little inspiration

holiday inspiration
1 / 2 / 3 / 4

The Thanksgiving leftovers aren't even gone yet, and I'm in full Christmas mode! I can't help myself - I wait (and pin!) for this all year long. Here are a few things that have me inspired to make things merry and bright!

11.17.2012


Ever since I saw this garland I've wanted to make my own (less-sparkly) version for Thanksgiving. Yesterday I was able to put one together with materials I already had in the house and it only took about an hour and a half - here's how I did it. 

First, I chose a simple, bold font in Word (this is Optima ExtraBlack). I enlarged the font to 400% and adjusted my margins so each letter would fit on a 5x8 notecard. Before printing I set the effects to 'outline', then I printed my letters on notecards. I cut each one out and used a glue stick to glue them face-down on the back of the patterned papers I wanted to use. After giving the letters a few minutes to dry, I cut out each one. I pressed them under some heavy books overnight and this morning I used a little dab of superglue to attach them to a ribbon. 

And that's it! It was quick and easy and I love the visual reminder to always give thanks.

10.30.2012

Calvin and Hobbes


A while back Michael took an interest in my old Calvin and Hobbes comic books. It made me so happy that he liked them! I'm not really a comic-book kind of girl, but ever since I was 10 years old something about these guys, their humor and sincerity, the story of a child whose best friend is an imaginary animal, has always felt so personal to me. Michael even reminds me of Calvin (some days more than others), so it seemed like the perfect Halloween costume - personal, easy, and inexpensive. All we needed was a red and black striped t-shirt and a Hobbes. 

The t-shirt was simple ($3.88 at Walmart!), the tiger was not. I originally planned to buy one (I assumed the market would be loaded with great Hobbes options - who wouldn't want a life-size stuffed Hobbes?) but found that there weren't any that lived up to the Hobbes of my imagination, and the few that I did find on etsy were expensive. So I was thrilled when I found this (free!) tutorial and pattern. I can't say enough good things about it. I'm about as novice as a sewer can get and I was able to easily understand the pattern and all of the steps. The only information I would add to the tutorial is a list of materials. I bought too much material and batting - 1 yard of orange fleece, 1/2 yard of white, and 1/2 yard of black, and one bag of batting is plenty.  It was a lot of work (I put in around 10 hours and I still have some hand-sewing to do on the stripes) but so worth it. Michael carried Hobbes proudly on Saturday, and a few days later he's still hugging his "Hobb". 

I figure if he ever loses interest, I'll be happy to keep Hobbes for myself ;)

9.26.2012

"M" is for Michael

As soon as I saw this pin I wanted to use the idea in Michael's room. When he was tiny I used to sing a silly little song to him with the words "M is for Michael" and he always grinned and cooed when I would sing it. So, the idea had some really tender sentimental value for me. It's also easy and inexpensive, which makes it exactly my kind of crafty. 

Wouldn't this be a cute for a baby shower? See the original tutorial here on Say Yes to Hoboken.

~ linking up with MMM ~

8.30.2012

Faves

These globes look so beautiful grouped together.

I'm always looking for new versions of the classic s'more.
A couple of reeeaaally good ones here and here.

The older I get, the more I love an indoor tent. This one is simple and so sweet.

And an easy mini party tent! See? Aren't tents the best?

The only thing better than an indoor tent - pretty indoor butterflies.

This coat. Now that we live in Houston I'm pretty sure I'll never need to wear a coat again,
but I can love it from afar.

Some of the prettiest fabrics I've seen in a long time.

4.05.2012


There are a whole lot of cute, creative Easter projects out there at the moment, but I think this one is my favorite. It's simple, fresh, and just right for the Easter table. I cant' wait to put my own together! I think I'll skip the decoupage patterns and work with clean, white eggs and lots of yellow blooms and green leaves. 
Click here for the full tutorial, and happy crafting! 

2.09.2012

Pinspiration

Are you on Pinterest? I am (find me here), and it has been a huge source of inspiration and fun! I love trying out the recipes and DIY projects that I pin. Some turn out to be a disappointment (like this cake), and others make me wonder how I ever lived without them! (Like this recipe for cilantro lime chicken - it is fantastic, and easy! The chicken cooks in the crock pot for six hours, then we serve it with black beans and spanish rice, and it is so, so good.) So, rather than keep them to myself, I'll be sharing some of my 'prize pins' here from time to time. 

Today I found one of my favorite pins, to date - ABC scripture cards. This one got me excited because although Michael and I read from a Bible story book every day, I am excited for him to learn real scriptures and not just the stories. This project is great, even for a very little one. There is one short scripture for each letter of the alphabet in an attractive, colorful template. 

I started by printing the scriptures onto cardstock, then laminated each page. 
Next, I trimmed the edges and cut apart the scriptures. I punched a hole in each one and put them on a ring. Easy as pie, and it took under an hour (counting the time I spent chasing my rug-rat around and pulling him down off of various furniture).
And it includes a bit of encouragement for the card-reader, too.
Now the fun part - sharing the words of life with my sweet baby :)

~linking up with Jellibean Journals~

1.27.2012

4.04.2011

Faves

Good morning! It's been a while, but here are some recent favorite things from around the interwebs. Hope they bring you a bit of inspiration, or at least bring a smile to your face!
Bibs made from old t-shirts - genius! (I have got to learn to sew...)
Best workspace EVER via black eiffel
A gorgeous country wedding where the bride carried strawberries in her bouquet (and that dress!) via you are my fave
Cute ideas for a baby shower spotted on oh happy day
Adorable forest creatures from eve's little earthlings spotted on unruly little things
Even though the next season is delayed until 2012, Mad Men will always be one of my faves - sigh

5.28.2010

Faves

Happy Memorial Day weekend out there! I'm back from one of the most refreshing weeks I've had in a long time! What a blessing to get away to a beautiful place and spend time with my love! A few {other} things that made me smile this week:

I'm loving Thomas Paul's bright, punchy colors. I especially love their fabrics - so gorgeous! Thanks for passing this along, Grant!

For those of us who think there aren't enough holidays with trees brought indoors and decorated, a birthday tree seen on oh happy day. The designer spray painted party poppers gold! What a great idea!

I am not in the market for baby stuff at this point in my life, but when I do have little ones of my own, I plan to dress them in hats with ears as often as possible. This genius little shop on etsy features many and they are adorable. 


Design sponge has a recurring column called 'Living In' (as in 'Living In: Alice and Wonderland', with photos of the film and items that capture the feel and style of the film). This week featured Wes Anderson's The Darjeeling Limited! I LOVE Wes Anderson, his style, his movies, and the items featured in this installment of 'Living In'. They do such a great job of capturing the style of the films they feature!

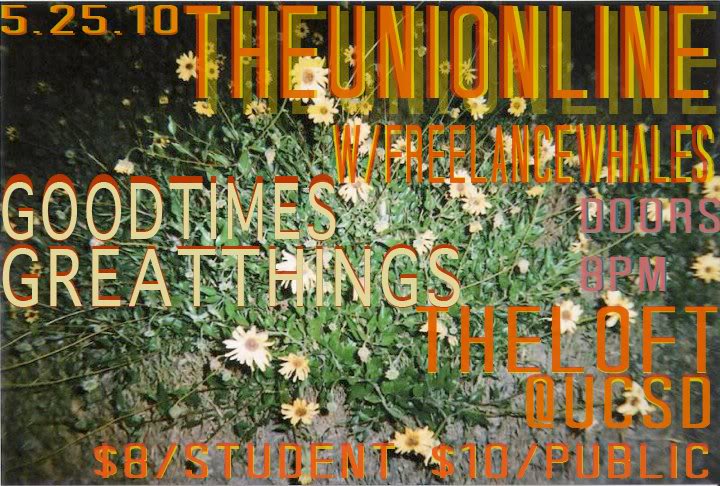
And finally, a great (new-to-us) band out of California, The Union Line. We saw these guys live while we were in San Diego and really enjoyed their sound! Check them out - I especially love New Song #1 and #2! Mmmmm, sounds like southern California...
Enjoy the long weekend!!! xoxo

2.06.2010

Little bundles

Two very dear friends of mine are expecting babies this spring. One friend is funky and offbeat and expecting a girl, and the other friend is more traditional and expecting a boy. Both friends are precious to me and I didn't want to just run down to Target and hit the baby aisle for a quick gift. I've been waiting for inspiration to strike and yesterday I came across this site with the most adorable and simple guide to making personalized onesies - perfect for both of my friends! I went right out and bought some cute fabric remnants, onesies, and fusible fabric and had the whole project done in about three hours with no sewing. (Poor Tim came home to onesies and tiny animals strewn all over the guest room and me grinning from ear to ear. I think it scared him! Haha!) It was so fun to choose the fabrics and animals that suit my friends (and their little ones) and make something for them with my own hands. And they turned out so cute! I'm thinking of making some for my dog now....